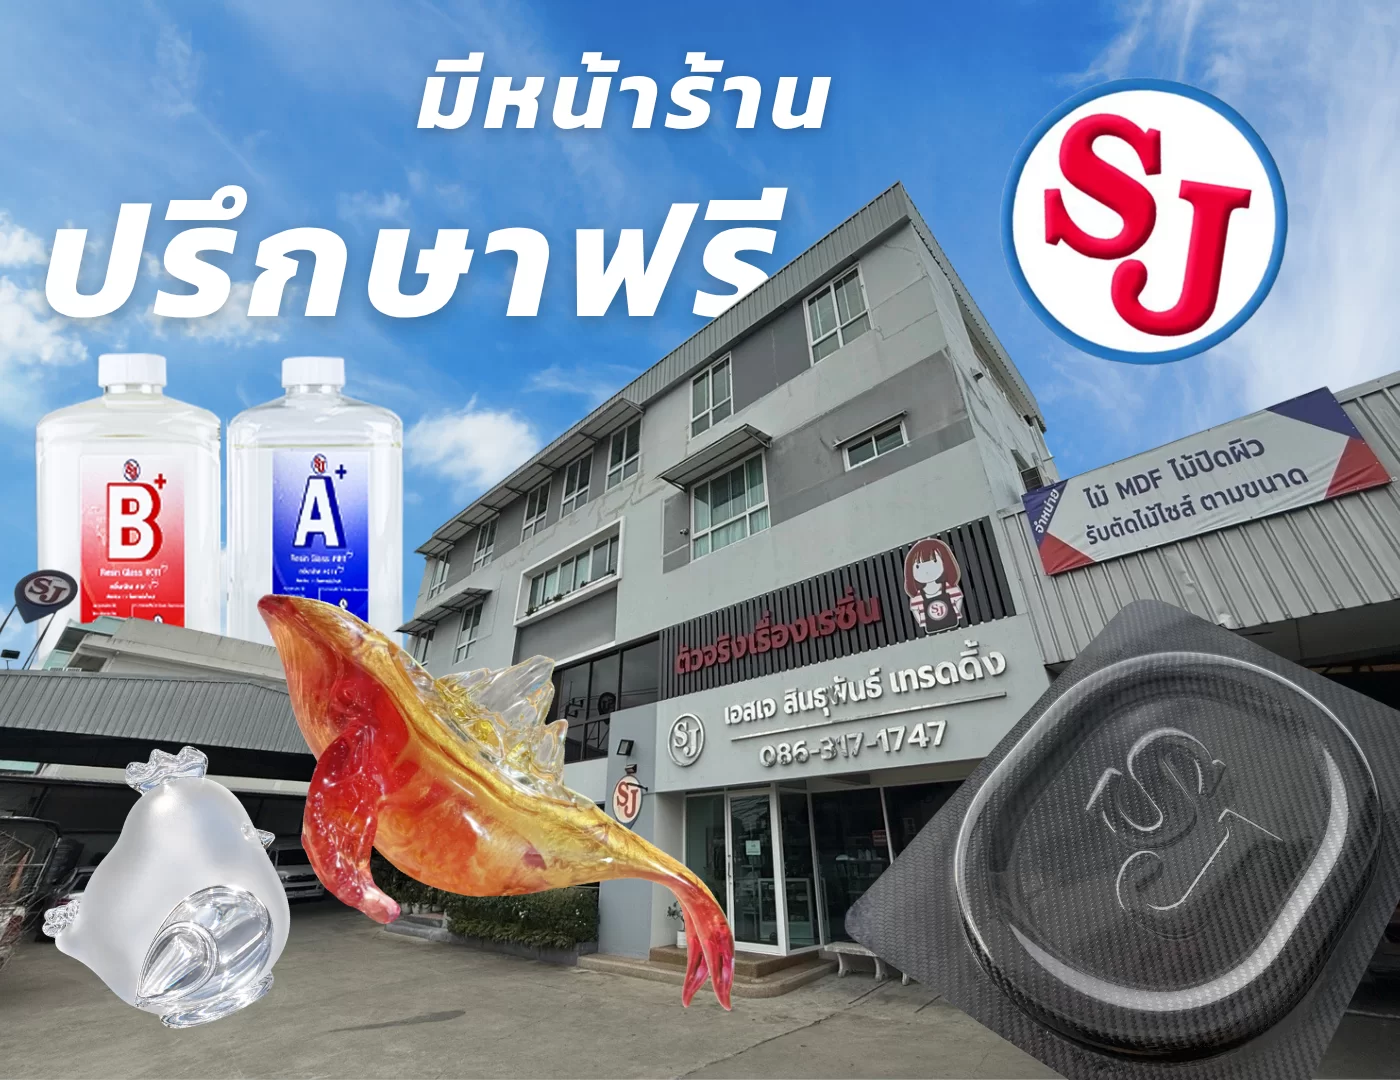




คำนวณเรซิ่นต้องใช้กี่กิโล คู่มือฉบับสมบูรณ์
คำถามที่ลูกค้า ResinSJ ถามเข้ามาบ่อยที่สุดคือ “งานขนาดเท่านี้ต้องใช้เรซิ่นกี่กิโล” คำถามนี้ตอบไม่ยาก แต่ถ้าคำนวณผิดจะเสียทั้งเงินและเวลา ผสมน้อยไปงานไม่เต็ม ผสมมากไปก็ทิ้งเปล่า บทความนี้รวมวิธีคำนวณและอัตราส่วนผสมของงานเรซิ่นทุกประเภทไว้ให้ครบ ใช้คู่กับเครื่องคำนวณด้านบนได้เลย
หลักการคำนวณปริมาณเรซิ่น
การคำนวณเรซิ่นมีแค่ 3 ขั้นตอน
- หาปริมาตรของชิ้นงาน จากขนาดกว้าง ยาว หนา
- แปลงปริมาตรเป็นน้ำหนัก โดยคูณด้วยความหนาแน่นของเรซิ่น อีพ็อกซี่ผสมแล้วอยู่ที่ประมาณ 1.15 ดังนั้นเรซิ่น 1 ลิตรจะหนักประมาณ 1.15 กิโลกรัม
- บวกเผื่อส่วนที่สูญเสีย จากเรซิ่นที่ติดค้างในถ้วยผสมและไม้คน
สูตรหาปริมาตรตามรูปทรง
| รูปทรง | สูตรหาปริมาตร |
|---|---|
| สี่เหลี่ยม | ยาว × กว้าง × สูง |
| ทรงกลม / แผ่นกลม | π × รัศมี² × ความหนา |
| ทรงกระบอก | π × รัศมี² × ความสูง |
| ทรงกรวย | π × รัศมี² × ความสูง ÷ 3 |
| พีระมิด | พื้นที่ฐาน × ความสูง ÷ 3 |
ถ้าชิ้นงานเป็นทรงแปลกที่ไม่เข้าสูตรไหนเลย ให้ประมาณเป็นกล่องสี่เหลี่ยมที่ครอบชิ้นงานพอดี แล้วหักลบส่วนที่เป็นช่องว่างออกด้วยสายตา วิธีนี้ให้ตัวเลขที่ใช้งานได้จริงและปลอดภัยกว่าการเดา
ควรเผื่อเรซิ่นเท่าไหร่
เรซิ่นจะติดค้างที่ผนังถ้วยผสมและไม้คนเสมอ ไม่ว่าจะกวาดดีแค่ไหน
- ทำครั้งแรก หรืองานชิ้นเล็ก เผื่อประมาณ 20% เพราะสัดส่วนที่ติดภาชนะเทียบกับปริมาณรวมสูง
- งานชิ้นใหญ่ ลดเหลือ 10% ได้ ทั้งนี้ขึ้นอยู่กับความสามารถในการกวาดเรซิ่นที่ติดกับภาชนะผสม
เทคนิคประมาณปริมาณจากชิ้นงานเดิม
ถ้าเคยทำงานลักษณะใกล้เคียงกันมาก่อน วิธีที่แม่นที่สุดคือเอาชิ้นงานเก่ามาชั่งน้ำหนัก แล้วใช้ตัวเลขนั้นเป็นฐานอ้างอิง วิธีนี้แม่นกว่าการคำนวณจากสูตร เพราะรวมส่วนที่สูญเสียจริงในกระบวนการทำงานเข้าไปแล้ว
เลือกเรซิ่นกล๊าสรุ่นไหนดี
อีพ็อกซี่เรซิ่นของ ResinSJ แต่ละรุ่นออกแบบมาสำหรับงานคนละแบบ เลือกให้ตรงกับงานจะได้ผลลัพธ์ดีกว่าและประหยัดกว่า
| รุ่น | อัตราส่วน A:B | เหมาะกับงาน |
|---|---|---|
| เรซิ่นกล๊าส 011 | 1 : 1 | งานทั่วไป หล่อบาง งานเคลือบ ยอมรับฟองอากาศเล็กน้อยได้ |
| เรซิ่นกล๊าส 011+ | 1 : 1 | งานหล่อใสที่ไม่อยากให้มีฟอง เนื้อเหลวกว่าจึงไล่ฟองได้ดี ใสที่สุดในกลุ่ม |
| เรซิ่นกล๊าส 021 | 2 : 1 | งานหล่อหนาระดับกลาง |
| เรซิ่นกล๊าส 021+ | 2 : 1 | งานหล่อหนามาก สูงสุดถึง 20 ซม. หรือประมาณ 5 กก. ต่อครั้งโดยไม่แตกร้าว เนื้อออกเหลืองกว่า จึงเหมาะกับงานผสมสี |
| เรซิ่นกล๊าส 021C | 2 : 1 | รุ่นใหม่ล่าสุด ใส หล่อหนาได้มาก เซ็ตตัวช้ามาก เหมาะกับงานที่ต้องการเวลาทำงานยาว |
สรุปสั้น ๆ ว่าเลือกตัวไหน
- อยากได้ งานใสไร้ฟอง ที่ไม่หนามาก เลือก 011+
- ทำ งานหล่อหนา หรือโต๊ะริเวอร์ เลือก 021+ หรือ 021C
- ทำ งานเคลือบผิว หรืองานทั่วไปที่ไม่ซีเรียสเรื่องฟอง เลือก 011
อัตราส่วนผสมอีพ็อกซี่เรซิ่น
รหัสสินค้าบอกอัตราส่วนอยู่ในตัวเอง รุ่นที่ขึ้นต้นด้วย 011 ผสม Part A 1 ส่วนต่อ Part B 1 ส่วน ส่วนรุ่นที่ขึ้นต้นด้วย 021 ผสม Part A 2 ส่วนต่อ Part B 1 ส่วน
ข้อสำคัญที่สุด คือต้องชั่งด้วยเครื่องชั่งดิจิทัลเท่านั้น ห้ามใช้การตวง เพราะ Part A มีความหนาแน่นมากกว่า Part B การตวงด้วยถ้วยจะได้สัดส่วนที่คลาดเคลื่อน และไม่ควรปรับอัตราส่วนจากที่ผู้ผลิตกำหนดเกิน ±10% เพราะจะกระทบทั้งความแข็งแรง ความแข็ง และความสมบูรณ์ของการเซ็ตตัว
ข้อผิดพลาดที่เจอบ่อยที่สุดคือรุ่น 021 ที่ลูกค้าเข้าใจสลับกันเป็น A 1 ส่วนต่อ B 2 ส่วน ผลคือเรซิ่นไม่แข็งตัวสมบูรณ์ ชิ้นงานออกมานิ่มหรือเหนียวติดมือ ตรวจสอบอัตราส่วนก่อนผสมทุกครั้ง
เทคนิคการคนให้เข้ากัน
- คนไปในทิศทางเดียวกันต่อเนื่อง เช่น ตามเข็มนาฬิกาอย่างเดียว
- อย่ายกไม้ขึ้นลงหรือตีแรงเหมือนตีไข่ เพราะจะดึงอากาศเข้าไปเป็นฟองในเนื้อเรซิ่น
- ขูดขอบข้างและก้นภาชนะให้ทั่ว จุดนี้คือสาเหตุอันดับหนึ่งของอาการเรซิ่นแห้งไม่สม่ำเสมอ
- ใช้เวลาคนประมาณ 3 นาที เมื่อเข้ากันดีแล้วความขุ่นเป็นใยจะหายไป ถ้าขูดขอบภาชนะแล้วยังเห็นเป็นเยื่อใส แปลว่ายังคนไม่พอ
โพลีเอสเตอร์เรซิ่น โคบอลต์และตัวเร่ง
โพลีเอสเตอร์เรซิ่นต่างจากอีพ็อกซี่ตรงที่ต้องผสมทั้งโคบอลต์และตัวเร่ง (MEKP) เพื่อให้เกิดปฏิกิริยาเซ็ตตัว
| สาร | อัตราส่วนมาตรฐาน | ต่อเรซิ่น 1 กก. |
|---|---|---|
| โคบอลต์ | 0.1% | 1 กรัม หรือประมาณ 20 หยด |
| ตัวเร่ง MEKP | 0.5% (ปรับได้ถึง 2%) | 5 กรัม หรือประมาณ 100 หยด |
ของเหลวประมาณ 1 กรัมเท่ากับ 20 หยด ใช้เทียบเวลาไม่มีเครื่องชั่งละเอียดได้ ปริมาณตัวเร่งปรับเพิ่มได้เมื่อมีความชำนาญและมั่นใจว่าทำงานทันก่อนเรซิ่นเริ่มเซ็ตตัว หรือในกรณีที่เติมสารเติมแต่งลงไปมากจนทำให้การเซ็ตตัวช้าลง
มีข้อยกเว้นสองกรณี เรซิ่นนิ่ม ใช้โคบอลต์ 0.2% ส่วน เรซิ่นออกใสพิเศษ ไม่ต้องเติมโคบอลต์เลย เพราะผสมโคบอลต์แบบใสมาจากโรงงานแล้ว
ลำดับการผสมที่ปลอดภัย
ห้ามผสมโคบอลต์กับตัวเร่งเข้าด้วยกันโดยตรงเด็ดขาด เพราะอาจเกิดความร้อนสูงและควันไฟได้ ลำดับที่ถูกต้องคือ
- ใส่โคบอลต์ลงในเรซิ่น คนให้เข้ากันจนทั่ว
- จากนั้นจึงใส่ตัวเร่งเป็นลำดับสุดท้าย
อีกเรื่องที่ควรรู้ เรซิ่นที่ผสมโคบอลต์แล้วจะมีอายุการเก็บเหลือเพียง 1–4 สัปดาห์ ขึ้นอยู่กับอุณหภูมิที่เก็บ ทาง ResinSJ จึงถามลูกค้าทุกครั้งว่าต้องการให้ผสมโคบอลต์ให้ฟรีหรือไม่
ผิวเหนียวของโพลีเอสเตอร์แก้ได้
โพลีเอสเตอร์เรซิ่นเมื่อเซ็ตตัวจะมีผิวหน้าเหนียวเหนอะหนะ เกิดจากออกซิเจนเข้าไปขัดขวางการแข็งตัว แก้ได้ด้วยการล้างและขัดออก หรือผสม Monowax 0.5–2% ลงไปในชั้นสุดท้าย พาราฟินแว็กซ์จะลอยขึ้นมาเรียงตัวปิดผิว กันออกซิเจน ทำให้ผิวเงาไม่เหนียว ทนน้ำได้ดีขึ้น และไม่เกิดคราบขาวเวลาโดนน้ำ
งานทำแม่พิมพ์
การคำนวณแม่พิมพ์ต่างจากงานหล่อทั่วไป เพราะต้องหักปริมาตรของต้นแบบออก สูตรคือ
ปริมาตรซิลิโคนที่ต้องใช้ = ปริมาตรภาชนะ − ปริมาตรต้นแบบ
ถ้าต้นแบบมีรูปทรงซับซ้อนจนคำนวณไม่ได้ ให้จุ่มต้นแบบลงในน้ำแล้ววัดว่าน้ำล้นออกมากี่มิลลิลิตร ตัวเลขนั้นคือปริมาตรของต้นแบบพอดี
| วัสดุ | อัตราส่วน | ลักษณะเด่น |
|---|---|---|
| ยางซิลิโคนแบบดั้งเดิม | ผสมตัวฮาร์ด 3% | ราคาประหยัด ใช้งานทั่วไป |
| ยางซิลิโคนใสนางฟ้า | Part A : Part B = 1 : 1 | เนื้อใส เห็นชิ้นงานข้างใน |
| ผงอัลจิเนต | ผง 1 ส่วน : น้ำ 2 ส่วน | ราคาถูกที่สุด แต่เซ็ตตัวเร็วมากและใช้ได้ครั้งเดียว |
ข้อควรระวังสำหรับ ผงอัลจิเนต คือเวลา ผงอัลจิเนต 1 ถุงมี 450 กรัม ผสมกับน้ำ 900 มล. ต้องคนให้เร็วที่สุดภายใน 2 นาที และถ้าใกล้ครบเวลาแล้วยังผสมไม่เข้ากันดี ให้รีบเทลงภาชนะไปเลย อย่ามัวคนต่อจนเซ็ตตัวคาถ้วย
สำหรับซิลิโคน ถ้าต้นแบบมีผิวพรุนมาก ให้ทาวาสลีนแล้วเช็ดออกให้หมาด ๆ ก่อนเท และควรยึดต้นแบบติดกับก้นภาชนะให้แน่น ไม่งั้นต้นแบบจะลอยขึ้นตอนเทซิลิโคนลงไป
งานไฟเบอร์กลาส FRP ทำอย่างไร
งานไฟเบอร์กลาสแนะนำให้ใช้โพลีเอสเตอร์เรซิ่น เพราะราคาคุ้มค่า แข็งตัวเร็ว และเข้ากับใยแก้วได้ดี กระบวนการแบ่งเป็น 3 ขั้นชัดเจน
ขั้นที่ 1 ชั้นรองพื้น
ช่วยเพิ่มการยึดเกาะกับพื้นผิวเดิมและอุดรูพรุนขนาดเล็ก ผสมโพลีเอสเตอร์เรซิ่นกับ Monostyrene 5–10% เพื่อลดความหนืดให้ไหลซึมได้ดี พร้อมตัวเร่ง 0.5–2%
ขั้นที่ 2 ชั้นไฟเบอร์กลาส
วางใยแก้วแล้วชุบเรซิ่น ใช้ลูกกลิ้งเหล็กรีดไล่ฟองและกดให้เรซิ่นซึมผ่านใยแก้วจนทั่ว
- ใช้เรซิ่นประมาณ 2–2.5 เท่า ของน้ำหนักใยแก้ว
- งานทั่วไปนิยม 3 ชั้น ด้วยใยแก้วเบอร์ 450 g/m²
- ผสมเรซิ่นทีละชั้นเท่านั้น ผสมรวมทีเดียวทั้งงานจะเซ็ตตัวก่อนทำเสร็จ
ขั้นที่ 3 ชั้นท็อปโค้ท
ชั้นปิดผิวสุดท้าย ทาหนาประมาณ 1 มม. ผสม Monowax 0.5% เพื่อให้ผิวแข็งตัวสมบูรณ์ ไม่เหนียว และเงางาม โดยไม่ต้องมาขัดผิวทีหลัง จำไว้ว่า Monowax ใส่เฉพาะชั้นสุดท้ายเท่านั้น ถ้าใส่ในชั้นล่างจะทำให้ชั้นถัดไปไม่ยึดเกาะ
เตรียมอะซิโตนไว้ล้างแปรงและลูกกลิ้งทันทีหลังใช้งาน ถ้าปล่อยให้เรซิ่นแห้งติดจะล้างไม่ออก
งานพื้นเรซิ่น Self Leveling
สำหรับงานเคลือบและงานพื้น มีสูตรลัดที่ใช้ประมาณคร่าว ๆ ได้ เรซิ่น 1 กิโลกรัม ทำพื้นได้ประมาณ 1 ตารางเมตร ที่ความหนา 1 มิลลิเมตร
ความหนาที่แนะนำสำหรับพื้น self leveling คือ 3 มิลลิเมตร เพื่อให้เรซิ่นปรับระนาบได้ด้วยตัวเอง และไม่ควรต่ำกว่า 2 มิลลิเมตร เพราะถ้าปริมาณเรซิ่นน้อยเกินไป เรซิ่นอาจดึงตัวเข้าหากันระหว่างแห้งและเกิดรอยแหวกขึ้นบนผิวงานได้ โดยเรซิ่นก่อนเซ็ตตัวจะมีการหดตัวเล็กน้อย
ปัญหาที่พบบ่อยและวิธีแก้
เรซิ่นแห้งไม่สม่ำเสมอ มีจุดเหนียว
สาเหตุคือผสมไม่ทั่วถึง โดยเฉพาะบริเวณขอบและก้นภาชนะ เรซิ่นส่วนที่ยังไม่เข้ากันถูกเทลงไปในชิ้นงานด้วย แก้ได้ 2 วิธี
- ล้างและซ่อม เช็ดเรซิ่นที่ไม่แห้งออกด้วยอะซิโตน ปล่อยให้แห้ง ขัดเปิดผิวเพื่อสร้างการยึดเกาะ แล้วผสมชุดใหม่เทซ้ำ เรซิ่นใหม่จะไหลเข้าไปเติมเต็มจนผิวกลับมาเรียบเงา แต่อาจเห็นรอยแบ่งชั้นบาง ๆ เมื่อมองจากด้านข้าง
- เททับด้านบน เหมาะกับงานที่ไม่เน้นความใสหรือความแข็งแรงเชิงโครงสร้าง เพราะภายในอาจยังมีเรซิ่นที่ไม่แข็งตัวหลงเหลืออยู่
เรซิ่นอ่อนตัว ยุบ ไม่เซ็ตตัวทั้งชิ้น
เกือบทั้งหมดเกิดจากอัตราส่วนผิด โดยเฉพาะรุ่น 021 ที่ผสมสลับเป็น 1:2 แทนที่จะเป็น 2:1 ตรวจสอบอัตราส่วนและใช้เครื่องชั่งที่แม่นยำทุกครั้ง
ฟองอากาศในชิ้นงาน
ฟองอากาศเกิดได้ทุกขั้นตอน ตั้งแต่การขนส่ง การคน การผสมสี ไปจนถึงการเท โดยธรรมชาติฟองจะลอยขึ้นด้านบนเสมอ และมีเวลาลอยขึ้นประมาณ 30 นาทีก่อนเรซิ่นเริ่มเป็นเจล ดังนั้นยิ่งเทลงชิ้นงานได้เร็วเท่าไหร่ ฟองก็ยิ่งมีเวลาลอยออกมากขึ้นเท่านั้น
เรซิ่นเซ็ตตัวเร็วผิดปกติ
ปัจจัยที่ทำให้ Gel Time สั้นลง
- ปริมาณที่ผสมต่อครั้ง ผสม 2 กก. อาจเริ่มแข็งใน 20 นาที ขณะที่ 1 กก. ใช้เวลาประมาณ 30 นาที
- ผงโลหะและผงมุก ผงทอง ผงเงิน ผงทองแดง เร่งปฏิกิริยาคายความร้อน บางกรณี Gel Time เหลือเพียง 15 นาที
- อุณหภูมิห้อง ยิ่งร้อนยิ่งเซ็ตตัวเร็ว
ในทางกลับกัน วันที่ฝนตกหรือความชื้นสูง โดยเฉพาะงานโพลีเอสเตอร์ เวลาเซ็ตตัวอาจนานขึ้นถึง 2 เท่า และความชื้นยังอาจทำให้ผิวขุ่นหรือเป็นรอยด่างได้
เวลาในการทำงานและการแกะแม่พิมพ์
- Working Time ประมาณ 30 นาทีก่อนเรซิ่นเริ่มเป็นเจล
- เทชั้นถัดไป อีพ็อกซี่เทชั้นต่อไปได้หลังผ่านไปอย่างน้อย 2 ชั่วโมง
- ถอดออกจากแม่พิมพ์ ทำได้หลังผ่านไปอย่างน้อย 4 ชั่วโมง แต่ต้องระวังรอยนิ้วมือและรอยเล็บ
- แข็งตัวสมบูรณ์ ภายใน 24 ชั่วโมง เมื่อครบแล้วใช้เล็บจิกจะไม่เกิดรอย
เทคนิคเพิ่มเติมจากหน้างานจริง
อยากให้สีเหมือนกันทุกครั้ง
ผสมสีลงใน Part A หรือ Part B ก่อน แล้วค่อยนำสองส่วนมาผสมกัน วิธีนี้ควบคุมเฉดสีให้สม่ำเสมอระหว่างการผลิตแต่ละรอบได้ดีกว่ามาก มีประโยชน์มากกับงานสีใสหรืองานที่ต้องหล่อหลายชั้น
Monostyrene ใช้ตอนไหน
Monostyrene ลดความหนืดของโพลีเอสเตอร์เรซิ่น ช่วยให้ซึมเข้าร่องและเนื้อผ้าได้ดี ผสมได้ไม่เกิน 20% และนิยมใช้ 5–10% ในชั้นแรกของงานเคฟล่าหรือไฟเบอร์ อย่างไรก็ตาม Monostyrene จะระเหยออกไปเมื่อเรซิ่นเซ็ตตัว ทำให้งานอาจหดหรือมีความแข็งแรงลดลง จึงไม่ควรใส่เกินความจำเป็น
คำถามที่พบบ่อย
เรซิ่น 1 ลิตร หนักกี่กิโลกรัม
อีพ็อกซี่เรซิ่นที่ผสม Part A กับ Part B แล้วมีความหนาแน่นประมาณ 1.15 หรือหนักกว่าน้ำราว 15% ดังนั้นถ้าต้องการเรซิ่นปริมาตร 1 ลิตร จะใช้เรซิ่นหนักประมาณ 1.15 กิโลกรัม
ทำไมต้องชั่งน้ำหนัก ตวงไม่ได้เหรอ
ไม่ได้ เพราะ Part A มีความหนาแน่นมากกว่า Part B การตวงด้วยถ้วยจะได้สัดส่วนที่ผิดจากที่กำหนด ส่งผลให้เรซิ่นเซ็ตตัวไม่สมบูรณ์
ผสมเรซิ่นครั้งละมาก ๆ ได้ไหม
ยิ่งผสมมาก ปฏิกิริยาคายความร้อนยิ่งสูงและเซ็ตตัวเร็วขึ้น เรซิ่นกล๊าส 021+ รองรับได้ถึงประมาณ 5 กก. ต่อครั้งโดยไม่แตกร้าว แต่ถ้าเกินกว่านั้นแนะนำให้แบ่งผสมเป็นหลายชุด
หล่อหนาได้สูงสุดเท่าไหร่
เรซิ่นกล๊าส 021+ หล่อหนาได้สูงสุดประมาณ 20 เซนติเมตร ส่วนรุ่น 011 และ 011+ เหมาะกับงานที่ไม่หนามาก ถ้าต้องการหล่อหนากว่านั้นแนะนำให้แบ่งเทเป็นหลายชั้น โดยเว้นระยะอย่างน้อย 2 ชั่วโมงต่อชั้น
เรซิ่นผสมโคบอลต์แล้วเก็บได้นานแค่ไหน
ประมาณ 1–4 สัปดาห์ ขึ้นอยู่กับอุณหภูมิที่จัดเก็บ ถ้ายังไม่ใช้ในเร็ว ๆ นี้ แนะนำให้เก็บแบบยังไม่ผสมโคบอลต์
คำนวณเสร็จแล้ว สั่งซื้อได้เลย
ใช้เครื่องคำนวณด้านบนเพื่อดูปริมาณที่ต้องใช้ทั้งหมด แล้วกดปุ่มคัดลอกสรุปส่งมาทางไลน์ ทีมงาน ResinSJ จะช่วยตรวจสอบตัวเลขและแนะนำสินค้าที่เหมาะกับงานของคุณ
ปรึกษาฟรี ไม่มีค่าใช้จ่าย LINE @resinsj
How Much Resin Do You Need? The Complete Guide
The question ResinSJ hears most often is “how much resin does a piece this size take?” It is not hard to answer, but getting it wrong costs money and time — mix too little and the piece is short, mix too much and the excess is wasted. This guide covers the calculation method and mix ratios for every type of resin work, and pairs directly with the calculator above.
How Resin Quantity Is Calculated
There are only three steps.
- Find the volume of the piece from its length, width and thickness.
- Convert volume to weight by multiplying by the density of the resin. Mixed epoxy is about 1.15, so 1 litre weighs roughly 1.15 kg.
- Add a waste allowance for the resin left behind in the cup and on the stirrer.
Volume formulas by shape
| Shape | Volume formula |
|---|---|
| Rectangle | length × width × height |
| Round plate | π × radius² × thickness |
| Cylinder | π × radius² × height |
| Cone | π × radius² × height ÷ 3 |
| Pyramid | base area × height ÷ 3 |
For an irregular shape that fits none of these, estimate the rectangular box that would just enclose the piece, then deduct the obvious empty space by eye. This gives a usable, safe figure and beats guessing.
How much should you allow for waste?
Resin always clings to the cup wall and the stirrer, no matter how carefully you scrape.
- First attempt, or small pieces — allow around 20%, since the amount left behind is large relative to the total.
- Large pieces — 10% is enough, depending on how well you scrape the mixing container.
Estimating from a previous piece
If you have made something similar before, the most accurate method is to weigh the old piece and use that as your reference. It beats the formula because it already includes the real losses of your own process.
Which Resin Glass Grade Should You Choose?
Each ResinSJ epoxy grade is built for a different job. Matching the grade to the work gives better results and costs less.
| Grade | Ratio A:B | Best for |
|---|---|---|
| Resin Glass 011 | 1 : 1 | General work, thin casting and coating, where a few small bubbles are acceptable |
| Resin Glass 011+ | 1 : 1 | Clear castings with no bubbles. Thinner body releases air well, and it is the clearest grade in the range |
| Resin Glass 021 | 2 : 1 | Medium-depth casting |
| Resin Glass 021+ | 2 : 1 | Deep pours up to 20 cm, or about 5 kg per batch, without cracking. Slightly more yellow, so it suits pigmented work |
| Resin Glass 021C | 2 : 1 | Newest grade. Crystal clear, very deep pours, very slow cure — ideal when you need a long working time |
The short version
- Want a clear, bubble-free piece that is not very thick — choose 011+.
- Doing a deep pour or a river table — choose 021+ or 021C.
- Doing surface coating or general work where bubbles do not matter — choose 011.
Epoxy Mix Ratios
The product code tells you the ratio. Grades beginning with 011 mix 1 part A to 1 part B. Grades beginning with 021 mix 2 parts A to 1 part B.
The single most important rule: weigh on a digital scale, never measure by volume. Part A is denser than Part B, so measuring with cups gives the wrong proportion. Do not deviate more than ±10% from the stated ratio either — it affects strength, hardness and whether the resin cures completely.
The most common mistake is with the 021 grades, where customers reverse the ratio to 1 part A and 2 parts B. The result is an incomplete cure: a piece that stays soft or tacky. Check the ratio before every mix.
Stirring technique
- Stir continuously in one direction — clockwise only, for example.
- Do not lift the stick in and out or beat the mix like eggs; that drags air into the resin.
- Scrape the sides and the bottom of the cup thoroughly. This is the number one cause of patchy curing.
- Stir for about 3 minutes. Once fully blended the cloudy streaks disappear. If scraping the wall still reveals a clear film, keep going.
Polyester Resin, Cobalt and Catalyst
Unlike epoxy, polyester resin needs both cobalt and MEKP catalyst before it will cure.
| Additive | Standard rate | Per 1 kg of resin |
|---|---|---|
| Cobalt | 0.1% | 1 g, roughly 20 drops |
| MEKP catalyst | 0.5% (up to 2%) | 5 g, roughly 100 drops |
About 1 gram of liquid equals 20 drops, which is useful when you do not have a fine scale. Increase the catalyst only once you are confident you can finish the work before the resin gels, or when heavy additive loading is slowing the cure.
Two exceptions: flexible resin uses cobalt at double rate, 0.2%, and pre-promoted clear resin needs no cobalt at all, because clear cobalt is already blended in at the factory.
The safe mixing order
Never combine cobalt and catalyst directly. Doing so generates extreme heat and can produce smoke or fire. The correct order is:
- Stir the cobalt into the resin until fully blended.
- Only then add the catalyst.
One more thing worth knowing: once cobalt is added, shelf life drops to 1–4 weeks depending on storage temperature. That is why ResinSJ always asks whether you want the cobalt blended in for you, free of charge.
Fixing the tacky surface
Cured polyester leaves a sticky top surface because oxygen interferes with the cure. You can wash and sand it off, or add Monowax at 0.5–2% to the final layer. The paraffin wax rises and forms a film that seals out oxygen, leaving a glossy, non-tacky surface with better water resistance and no white bloom when wet.
Mould Making
Mould calculations differ from casting because the master volume has to be deducted:
Silicone required = container volume − master volume
If the master is too complex to calculate, submerge it in water and measure the overflow in millilitres. That figure is the master volume exactly.
| Material | Ratio | Character |
|---|---|---|
| Traditional silicone | 3% hardener | Economical, general purpose |
| Angel clear silicone | Part A : Part B = 1 : 1 | Transparent, you can see the piece inside |
| Alginate powder | 1 powder : 2 water | Cheapest option, but sets very fast and is single use |
The critical factor with alginate is time. One bag holds 450 g and mixes with 900 ml of water. You must mix as fast as possible within 2 minutes, and if you reach that point still not fully blended, pour anyway rather than let it set in the cup.
For silicone, if the master is very porous, apply petroleum jelly and wipe it back to a thin film before pouring. Anchor the master to the bottom of the container as well, or it will float when the silicone goes in.
Fibreglass FRP, Step by Step
Polyester resin is the recommended choice for fibreglass work: good value, fast curing, and it wets out glass fibre well. The process has three clear stages.
Stage 1 — Primer coat
Improves adhesion to the existing surface and fills small pores. Mix polyester resin with 5–10% Monostyrene to thin it for penetration, plus 0.5–2% catalyst.
Stage 2 — Laminate
Lay the glass cloth and wet it out with resin, then use a steel roller to drive out air and push resin through the fibres.
- Use roughly 2–2.5 times the weight of the glass in resin.
- Typical work uses three layers of 450 g/m² cloth.
- Mix one layer at a time. A single batch for the whole job will gel before you finish.
Stage 3 — Top coat
The final sealing layer, applied about 1 mm thick with 0.5% Monowax so the surface cures fully, stays non-tacky and finishes glossy without sanding. Remember that Monowax belongs in the top coat only — in lower layers it will prevent the next layer from bonding.
Keep acetone on hand to clean brushes and rollers immediately after use. Once the resin cures on them, they cannot be recovered.
Self Levelling Resin Floors
For coating and floor work there is a simple rule of thumb: 1 kilogram of resin covers about 1 square metre at 1 millimetre thick.
The recommended thickness for a self levelling floor is 3 millimetres so the resin can level itself, and never below 2 millimetres — too little resin pulls itself together as it cures and leaves splits or hollows on the surface, since resin shrinks slightly before it sets.
Common Problems and Fixes
Patchy curing with sticky spots
The cause is incomplete mixing, usually at the cup wall and bottom. That unmixed resin gets poured into the piece along with everything else. There are two fixes.
- Clean and repair. Wipe the uncured resin away with acetone, let it dry, sand the surface to create a key, then mix a fresh batch and pour again. The new resin flows in and restores a smooth glossy face, though a faint layer line may be visible from the side.
- Pour over the top. Suitable when clarity and structural strength are not critical, since uncured resin may remain inside the piece.
Soft, sunken or incompletely cured pieces
Almost always a ratio error, particularly the 021 grades mixed 1:2 instead of 2:1. Check the ratio and use an accurate scale every time.
Bubbles in the piece
Bubbles can enter at any stage — transport, stirring, pigment mixing, pouring. By nature they always rise, and they have roughly 30 minutes before the resin gels. The faster you get the resin into the piece, the more time bubbles have to escape.
Resin curing faster than expected
Factors that shorten gel time:
- Batch size. A 2 kg batch may start to harden in 20 minutes, while 1 kg takes around 30.
- Metallic and pearl powders. Gold, silver and copper powders accelerate the exotherm; gel time can drop to about 15 minutes.
- Room temperature. The warmer it is, the faster it sets.
Conversely, on rainy or humid days — especially with polyester — cure time can double, and humidity may also leave the surface cloudy or blotchy.
Working Time and Demoulding
- Working time — about 30 minutes before the resin begins to gel.
- Next layer — epoxy can be poured over after at least 2 hours.
- Demould — after at least 4 hours, taking care to avoid fingerprints and nail marks.
- Full cure — within 24 hours. After that a fingernail will not mark the surface.
Extra Techniques From the Workshop
Getting the same colour every time
Blend the pigment into Part A or Part B before combining the two. This keeps the shade consistent between batches, which matters most for tinted transparent work and multi-layer castings.
When to use Monostyrene
Monostyrene thins polyester resin so it penetrates grooves and wets out cloth. Use no more than 20%, and typically 5–10% on the first layer over kevlar or glass. Bear in mind that it evaporates as the resin cures, which can cause shrinkage and reduce final strength, so use no more than the job needs.
Frequently Asked Questions
How much does 1 litre of resin weigh?
Mixed epoxy has a density of about 1.15, roughly 15% heavier than water, so 1 litre weighs about 1.15 kg.
Why weigh instead of measuring by volume?
Because Part A is denser than Part B. Measuring with cups gives a proportion different from the specification, and the resin will not cure properly.
Can I mix large batches?
The larger the batch, the stronger the exotherm and the faster the cure. Resin Glass 021+ handles about 5 kg per batch without cracking; beyond that, split it into several batches.
What is the maximum pour depth?
Resin Glass 021+ pours up to about 20 centimetres. The 011 grades suit thinner work. For anything deeper, pour in layers with at least 2 hours between them.
How long does cobalt-promoted resin keep?
Roughly 1–4 weeks depending on storage temperature. If you are not using it soon, store it without cobalt.
Calculated? Time to Order
Use the calculator above to get your full material list, then tap the copy button and send it to us on LINE. The ResinSJ team will check the figures and recommend the right product for your job.
Free advice, no obligation — LINE @resinsj
คำนวณวัสดุเสร็จสามารถเลือกดู เรซิ่น ยางซิลิโคน ไฟเบอร์กลาส ได้ที่ลิงค์นี้ คลิ๊ก
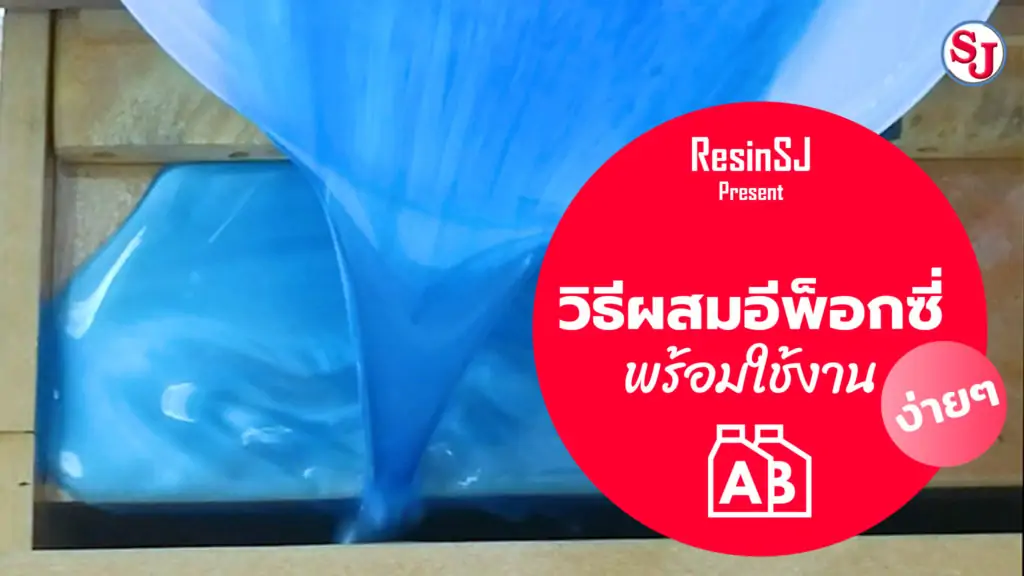
1.ชั่งตวง
ชั่งตวงปริมาณน้ำยาตามปริมาณที่ต้องการใช้งาน โดยเริ่มจาก Part A

2.ผสมสี
ในกรณีที่อยากผสมสี ให้ผสมสีให้เสร็จก่อนจะผสมผสมกับ Part B มาผสมรวม
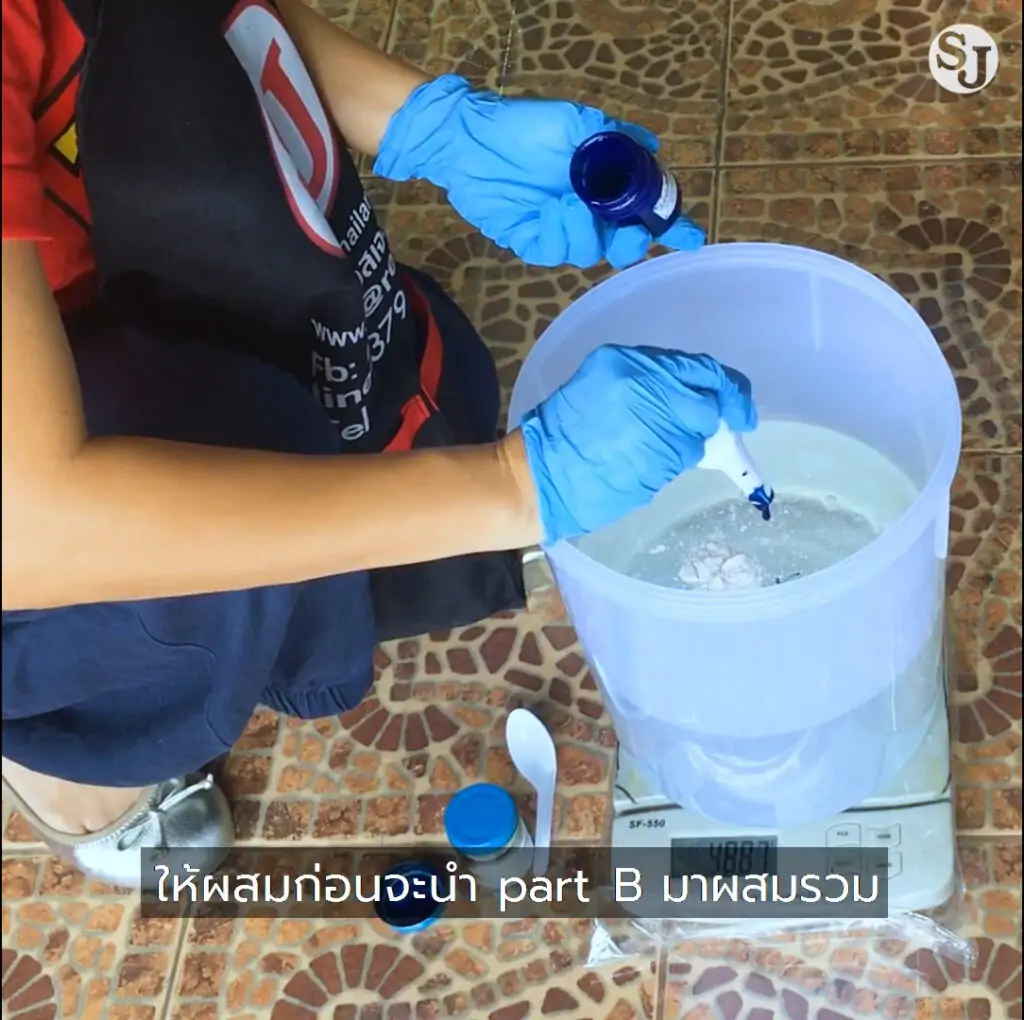
3.ผสมสีให้เข้ากับน้ำยา
เมื่อเราทำการเทสีลงแล้วให้ทำการคนให้เข้ากัน ก่อนที่จะนำไปผสมกับ Part 2

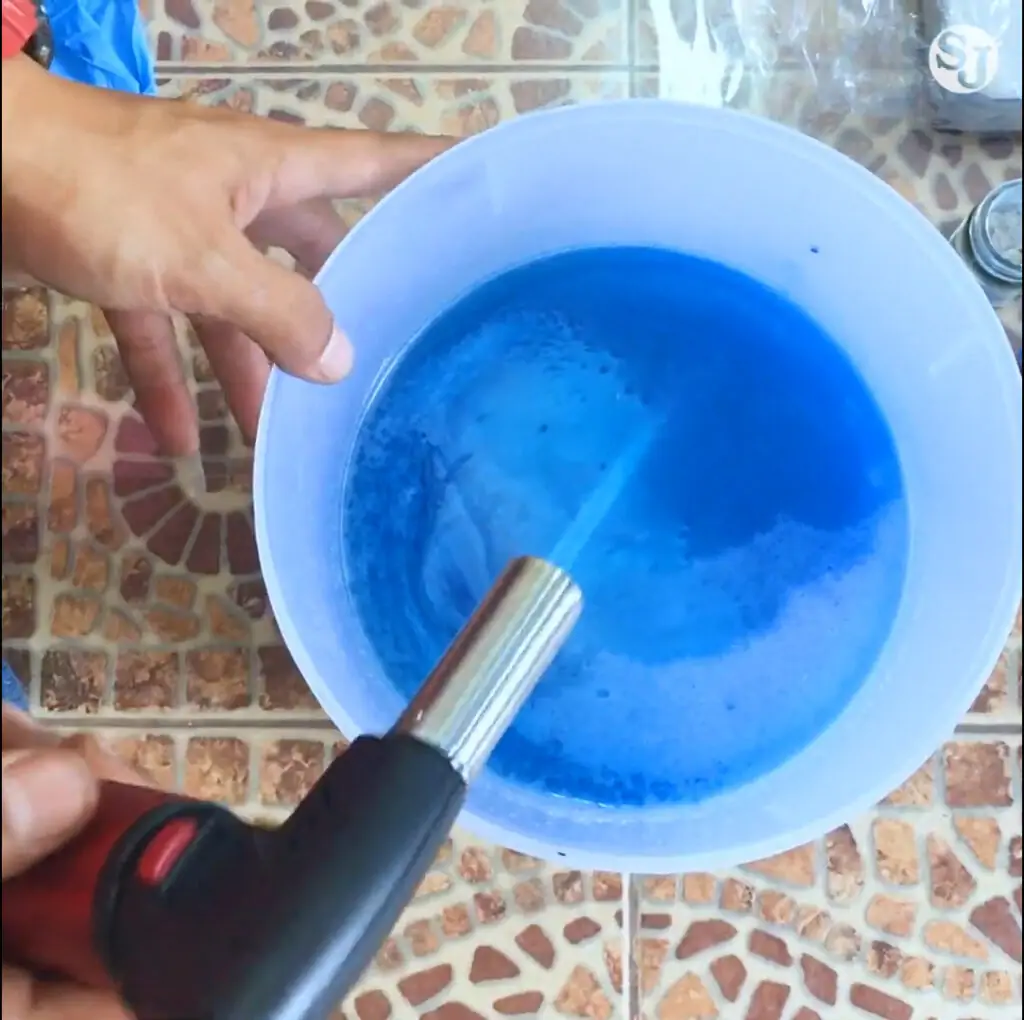
4.ไล่ฟอง
เมื่อผสมสีเข้ากันกับ Part A เสร็จแล้ว ให้ทำการไล่ฟองออกด้วยการใช้ไฟเป่าผ่านๆ ระวังอย่าแช่ไว้
5.ผสม Part B
เมื่อไล่ฟองออกไปแล้วให้ทำการผสมน้ำยา Part B ลงไป อัตราส่วนตามรุ่นที่เลือกใช้
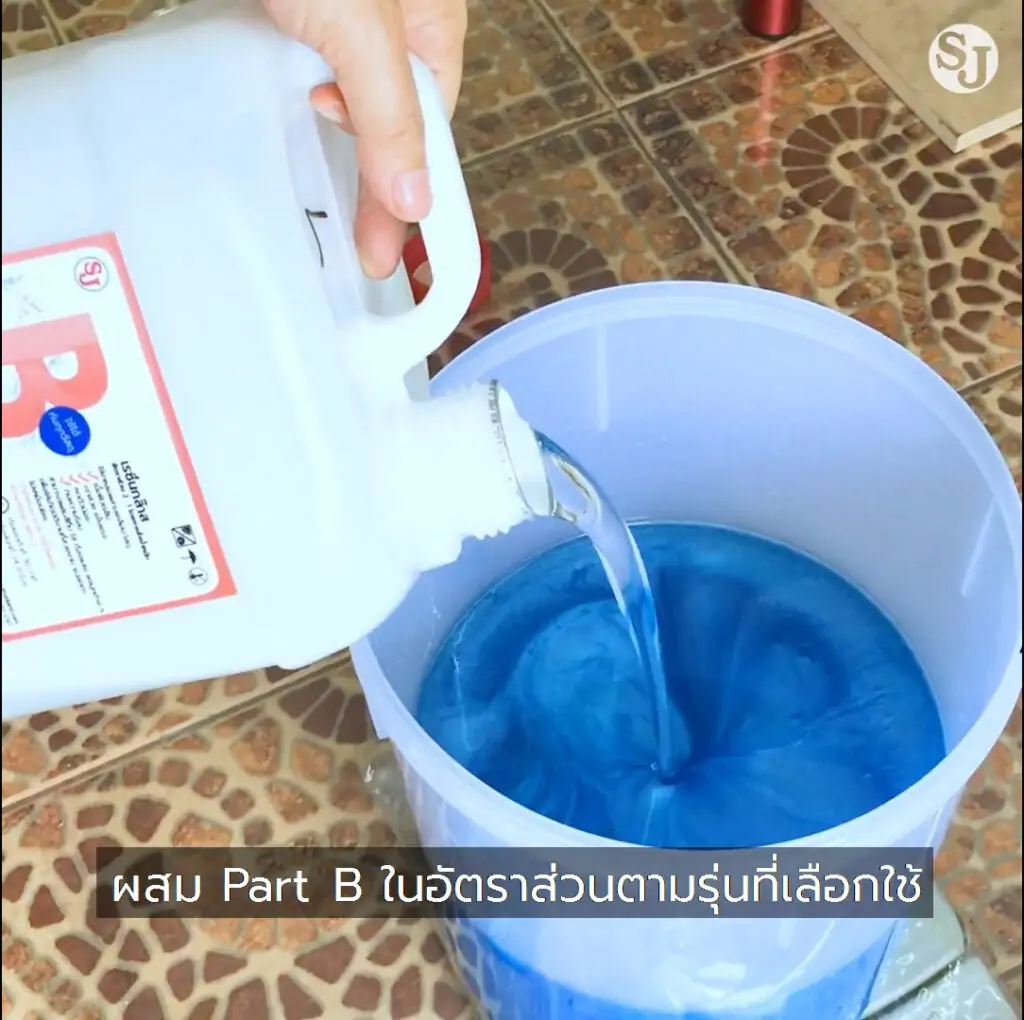
6.คนให้เข้ากัน
เมื่อผสม Part B เข้าไปแล้ว ให้คนจนน้ำยาเริ่มเซ็ตตัว *ควรผสมเมื่อเริ่มใช้งานเท่านั้น

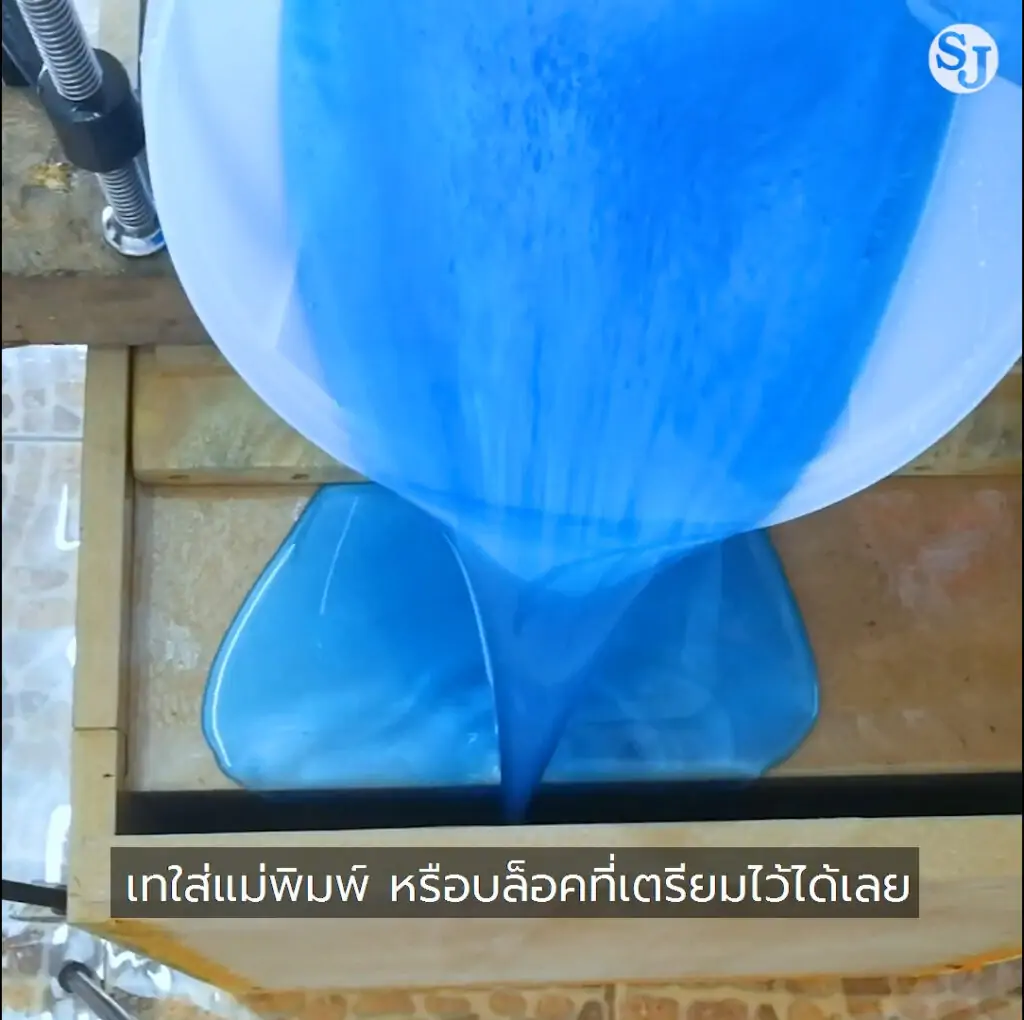
7.เทลงแบบ
เมื่อไล่ฟองออกไปแล้วให้ทำการผสมน้ำยา Part B ลงไป อัตราส่วนตามรุ่นที่เลือกใช้

บริษัท เอสเจ สินธุพันธ์เทรดดิ้ง จำกัด
โทรศัพท์ : 02-3794555 , 02-3794575 , 02-3794604
โทรศัพท์มือถือ : 088-2990267 , 086-3171747
Line ID : @resinsj
Facebook : เรซิ่น เอสเจลำสาลี
“งานเรซิ่น … นึกอะไรไม่ออก บอกเอสเจจร๊า”